Using OAuth 2 with Webex in Your Flask Application
May 4, 2022

None of the interesting functionality of the Webex REST API are available to a potential Webex Integration, or combined Webex Embedded App and Integration Solution, without first implementing the supported OAuth 2 process to request permission to make API calls on behalf of a Webex user. This walk through will take the reader through the necessary steps to successfully create an Integration in the Webex Developer Portal, obtain a personal access token, obtain a refresh token when necessary, and make authorized Webex RESTful API calls using the above information. Although we will be using the Flask framework, the principles and implicit grant flow are similar regardless of the tools in which you would like to develop the integration. This Flask example should help you get started on your project.
https://github.com/WebexSamples/webex-flask-oauth-example
Registering Your Integration
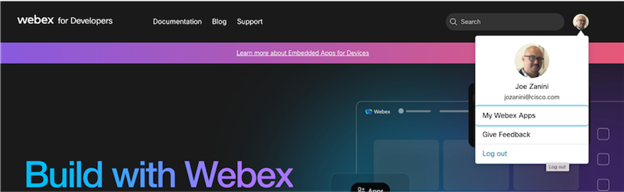
Registering an integration with Webex is easy. Go to developer.webex.com and login. If you do not have an account, click the Sign Up button and create a free Webex account to get started. Once logged in, you can click on the circle icon in the top right corner of the browser window and select the My Webex Apps option.
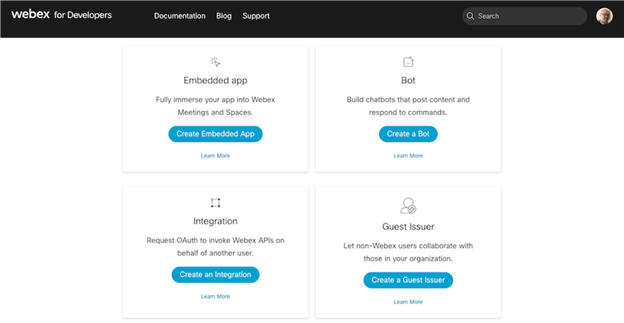
Next, click the Create new App button and select the Create an Integration button from the app type options.
Here you will be required to name the integration, select, or upload an icon for use on the developer portal, give a description of the app that you are building, provide a Redirect URI that a user will be redirected to when completing an OAuth grant flow, and define the grant scopes to define the level of access that the integration requires for the Webex API calls that will be generated by the app you are developing. In the example application, the spark:all scope is used for simplicity, but in production be sure to use the minimum necessary scopes from the OAuth list. These fields are editable after the integration is created. Once you have supplied the required data in the respective fields, select the Add Integration button at the bottom of the page. Now you will have access to a Client ID, Client Secret, and an OAuth Authorization URL to be used in the OAuth grant flow.
The Flask Set up
In our sample application, we set up a Flask project that depends on the Jinja template engine. The only parent template in this example is called temp.html.This file is in the template directory and contains some standard html and a Webex image that will be inherited by each template html file that extends this parent template. The Python file oauth.pyimports some standard Python libraries like get from webbrowser, requests, json, os and flask.
The OAuth 2 Grant Flow in Action
To start out with the example application, we need to follow the instructions in the README file and replace the generic lines of code in oauth.py with the Client ID and the Client Secret that were generated from the Registering Your Integration section above. These items will be used to let the Webex server at https://webexapis.com/v1/authorize identify your integration when granting access to the Webex REST API on the user’s behalf when we need to obtain an access token and a refresh token.
clientID = "YOUR CLIENT ID HERE"
secretID = "YOUR CLIENT SECRET HERE"
redirectURI = "http://0.0.0:10060/oauth" # This could be different if you publicly expose this endpoint.
Next you will need to replace the generic URL within the <a> tag element on line 8 of index.html in the templates directory of the project with your OAuth Authorization URL from the Registering Your Integration section above. In this example code, the state parameter is hard coded for simplicity. In production this may be randomized programmatically.
{% extends "temp.html" %}
{% block content %}
  <h1>GRANT INTEGRATION ACCESS</h1>
  <!-- STEP 1 : Button that kicks off the flow by sending your user to the following URL along with a standard set of OAuth query parameters, state parameter is                             hard coded here-->
  <!-- The scope parameter in the integration is set to spark:all for simplicity in this example, in production this should be fine tuned -->
  <div class='center'>
    <a href='https://webexapis.com/v1/authorize?REPLACE WITH YOUR OAUTH AUTHORIZATION URL PARAMETERS state=1234abcd'>
      <div class='button' style='width:512px;'>GRANT</div>
    </a>
  </div>
{% endblock %}
Lastly, navigate to the directory in which the project resides and run python3 oauth.py. Then copy and paste the URL in which the development server is listening on into the browser bar of a web browser.
* Serving Flask app 'oauth' (lazy loading)
* Environment: production
  WARNING: This is a development server. Do not use it in a production deployment.
 Use a production WSGI server instead.
* Debug mode: off
* Running on all addresses (0.0.0.0)
  WARNING: This is a development server. Do not use it in a production deployment.
* Running on [http://127.0.0.1:10060
](http://127.0.0.1:10060)* Running on [http://10.24.202.12:10060](http://10.24.202.12:10060) (Press CTRL+C to quit)
The OAuth Grant Flow
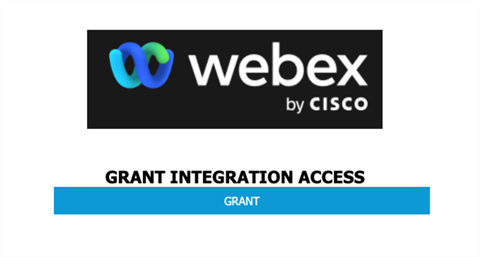
First the user reaches the portion of the application that begins the integration with Webex. In the case of the example app, the user is presented with a button labeled GRANT. Once the button is clicked, the defined hyperlink attribute within the <a> tag redirects the user to the OAuth Authorization URL that was provided during set up.
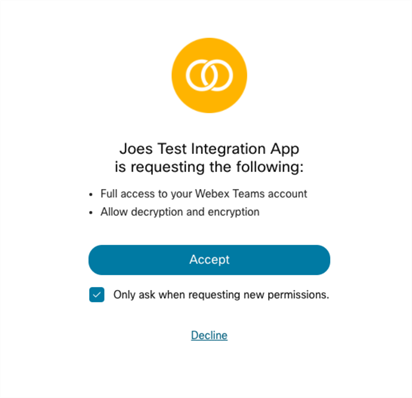
The user is then prompted to login to Webex and to grant permission for your app to access the Webex REST API end points at the scopes defined when registering the Integration in the Webex Developer Portal.
@app.route("/oauth") # Endpoint acting as Redirect URI.

def oauth():
  print("function : oauth()")
  """Retrieves oauth code to generate tokens for users"""
  state = request.args.get("state")
  print('state : ' + state)
  if state == '1234abcd':
    code = request.args.get("code") # STEP 2 : Capture value of the
                                    # authorization code.
    print("OAuth code:", code)
    print("OAuth state:", state)
    get_tokens(code)
    return render_template("granted.html")
  else:
    return render_template("index.html")

def get_tokens(code):
  print("function : get_tokens()")
  print("code:", code)
  #STEP 3 : use code in response from webex api to collect the code parameter
  #to obtain an access token or refresh token
  url = [https://webexapis.com/v1/access_token
](https://webexapis.com/v1/access_token)  headers = {'accept':'application/json','content-type':'application/x-www-form-urlencoded'}
  payload = ("grant_type=authorization_code&client_id={0}&client_secret={1}&"
  "code={2}&redirect_uri={3}").format(clientID, secretID, code, redirectURI)
  req = requests.post(url=url, data=payload, headers=headers)
  results = json.loads(req.text)
  access_token = results["access_token"]
  refresh_token = results["refresh_token"]

  session['oauth_token'] = access_token
  session['refresh_token'] = refresh_token

  print("Token stored in session : ", session['oauth_token'])
  print("Refresh Token stored in session : ", session['refresh_token'])
  return
Upon successful user authentication, the Webex REST API will redirect the user to the redirect URI that you specified when registering your integration in the Webex Developer Portal. In the example application that is http://0.0.0.0:10060/oauth. The http request to the redirect URL will contain a code parameter to serve as an authentication code to be exchanged for an Authentication Token, and a Refresh Token. The original State parameter will be returned, it is hard coded in the example application, to prove to your application that the request has not been tampered with in traffic, we check that the state has not changed since the kickoff of the OAuth grant flow in index.html.
The code is then extracted from the request and exchanged via an HTTP POST request to https://webexapis.com/v1/access_token with a standard set of OAUTH parameters that include grant_type(should be set to “Authorization code),client_id,client_secret,code(authorization code from the previous step),and theredirect_uri. This is executed in the example code via a python function called get_tokens().
Once these tokens are exchanged, and collected by the application, they are stored in the Flask Session object for later use when making calls against the Webex REST API. The example application demonstrates this by making a call to https://webexapis.com/v1/rooms on behalf of the authenticated user via the Spaces button that should be populated on the screen upon successful token transfer.
Try It Now
A copy of the example application is available on GitHub:
https://github.com/WebexSamples/webex-flask-oauth-example
Follow the GitHub README to setup and configure the example application
Engage With Us
The Webex Developer Community has dedicated topics, discussion groups, and announcements. We encourage you to tell us about your experience using the above example application there.